A Comprehensive Guide to Dark Food Photography
Share
Dark food photography is a unique and moody style that focuses on restricting light to highlight certain elements of a composition, creating stunning, dramatic images. Here's a detailed look into how to achieve this style, from setting up your scene to editing in Lightroom.
1. Understanding the Concept
Dark food photography is about embracing shadows. It uses controlled lighting to focus on the subject, leaving the rest of the scene in shadow. Instead of allowing light to spill over, the key is to direct it in a very narrow and controlled way. This results in high contrast and rich textures, giving food photos an intense, dramatic look. The concept is simple, but execution requires precision and careful planning.
2. Setting Up Your Scene
The most critical element in dark food photography is controlling your light source. For continuous light (natural light or LED), the idea is to block as much light as possible, allowing it to only hit your subject. In Joanie Simon’s example, she uses a Westcott LED flex mat to simulate window light, which she diffuses to soften the shadows on her food subject. However, for natural light photographers, think of using your window as your primary light source.
To restrict light, you can use black foam core boards or any other dark material. Position these boards around your subject to create a "tunnel" of light that only illuminates your chosen area, letting the rest of the scene fade into darkness.
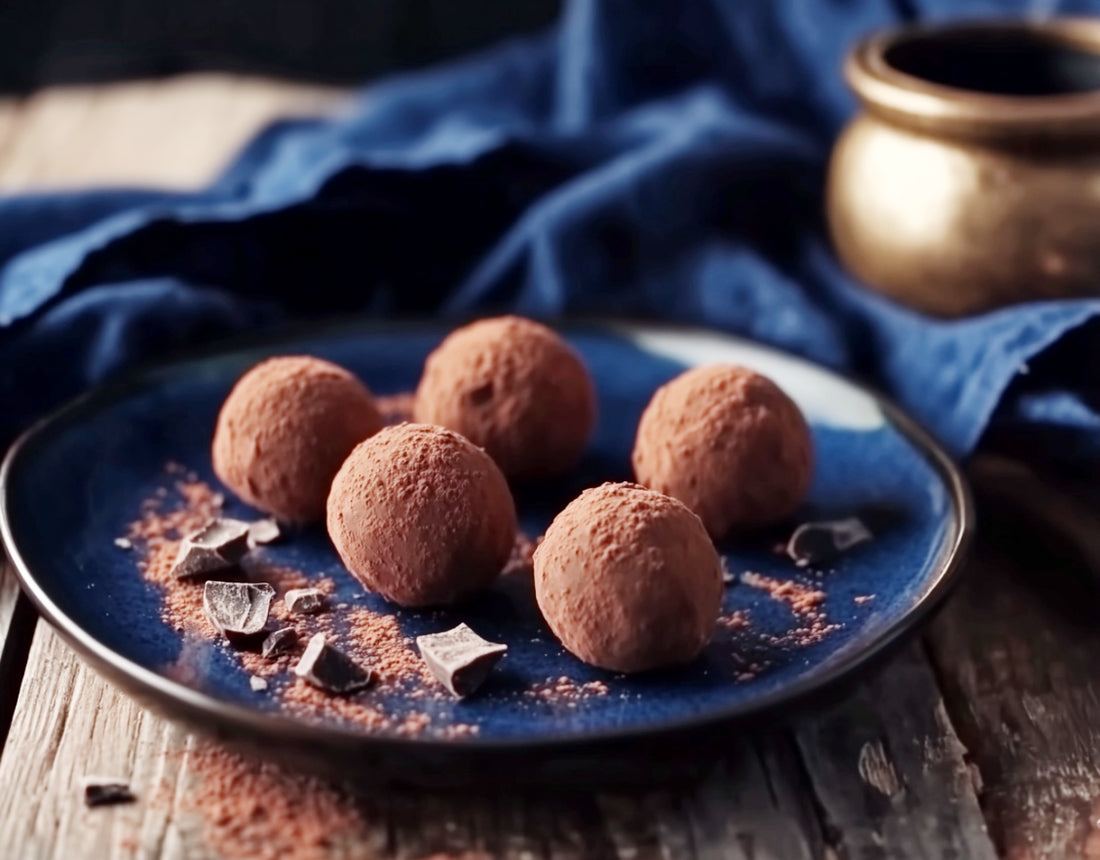
Simon often creates a mini “house” around her subject using two black foam core boards pinned together, ensuring light only touches the focal points she desires. This is especially useful for highlighting textures and specific food details, such as a bowl of truffles.
3. Choosing the Right Props and Background
Choosing dark-colored props and backgrounds ensures that the food, rather than the surrounding elements, is the highlight of the shot. Dark surfaces, linens, and muted colors will all work in harmony to create an atmosphere where the food shines. Bright props like a white ramekin, for example, can draw too much attention, disrupting the intended focus.
4. Fine-Tuning the Scene
Sometimes, even after you've set up your light modifiers, there can be too much spill or distraction in certain areas of the frame. Joanie recommends using additional objects, such as decorative boards, to block excess light or create more dynamic shadows, emphasizing specific parts of the dish.
5. Editing in Lightroom
Editing is where the magic of dark food photography comes alive. After capturing your shot, import it into Lightroom for fine adjustments:
- Crop and Straighten: Make sure the horizon lines are perfectly straight.
- Adjust Exposure: Slightly increase the exposure, but leave room for further adjustments.
- Tone and Contrast: Reduce highlights, increase shadows for detail, and balance out whites and blacks for contrast.
- Clarity and Texture: Increase clarity to emphasize textures. The rougher and more detailed your food subject is, the more clarity will help it pop.
- Tone Curve: This is where you can adjust the depth of shadows and highlights. A slight lift in the blacks can give that vintage, hazy look, while pulling down the shadows sharpens the focus on your subject.
- Color Adjustments: Play with the HSL (Hue, Saturation, Luminance) panel to adjust specific colors in the image. Simon suggests reducing the luminance of blues or oranges to deepen the colors without over-saturating them.
6. Adding Vignette and Final Adjustments
In dark food photography, a subtle vignette helps frame your subject without distracting from the food. Be careful not to overdo this, as it can easily look forced or heavy-handed. A small amount of de-hazing can also add crispness to your image, making textures stand out even more.
7. Finishing Touches
Once you're happy with your edits, make sure to review the image. Often, small distractions like stray crumbs or overly bright highlights can be removed or toned down for a cleaner, more professional look. The goal is to guide the viewer’s eye to the main subject, ensuring that all other elements in the frame enhance, rather than compete with, the food.
Conclusion
Dark food photography is an art form that embraces shadows and contrast to create mood and drama in food imagery. With the right setup, light control, and thoughtful editing, you can achieve those visually compelling images that capture attention on platforms like Instagram. Whether you're using natural light or artificial sources, the key is in focusing the light precisely where you want it, and enhancing it through careful editing to create that signature moody style.
So go ahead and grab your camera, some black foam core, and start experimenting with dark food photography in your own kitchen!
